


Swarovski EL Range Retrofit & TA Adapter Review: What You Need to Know Before You Buy
Thinking about pairing your EL Range binoculars with the new Swarovski TA Adapter for digiscoping or tripod use? Here's everything you need to know about the retrofit process—plus why it took 2.5 months instead of two weekends.
Introduction
When I picked up the Swarovski EL Range 8x42 binoculars, I was excited to pair them with the Swarovski TA Adapter for a secure and repeatable digiscoping and tripod mount system. But there was a catch: my binoculars weren’t compatible.
Turns out, unless your EL Range binos are the most recent model—and a specific size—the TA Adapter won’t work without a retrofit to the center hinge. Fortunately, Swarovski offers this service free of charge, but in my case, the process took much longer than expected. In this post, I’ll break down what actually happened, what to expect from the TA Adapter, and whether the upgrade is worth it.
Important Compatibility Note
Before you go any further, it’s important to know that the new TA-S Adapter for the EL Range is only compatible with the 10x42 and 12x42 models—not the 8x42. If you’re using a different configuration, this adapter won’t work even after a retrofit.
That’s a crucial detail that Swarovski doesn’t always make obvious, so double-check your model before sending anything in.
Why the Retrofit Is Needed
The TA Adapter is designed to mount securely to a revised center hinge that’s only found on updated EL Range models. If you own an earlier version—even if purchased recently—your binoculars will likely need a retrofit to make them compatible.
This retrofit is free through Swarovski Optik USA (if you're under warranty and bought through an authorized dealer), but read on to see why your timeline might vary.
The Retrofit Process: My Real-World Experience
Swarovski initially estimated the process would take just a couple weekends, but here’s how it really unfolded for me:
Initial Contact – I reached out to Swarovski Optik USA with my product info and serial number. They confirmed eligibility and provided shipping instructions.
Shipping & Insurance – I packed the binos and paid $90 for shipping insurance to cover the value in transit. This cost was out of pocket.
Unexpected Delay – After receiving the binos, Swarovski informed me they had to send them to Austria for retrofitting. This extended the turnaround time to about 2.5 months.
Excellent Communication – Despite the delay, Swarovski kept me updated with status emails and tracking info.
Successful Return – My EL Range binoculars came back fully retrofitted and compatible with the TA Adapter system.
While the timeline wasn’t ideal, I really appreciated their transparency and top-tier customer support throughout.
TA Adapter Review: Is It Worth the Hype?
After the retrofit, I finally got to mount the TA Adapter and put it through some serious field use with my iPhone 15 Pro Max and other optics.
👍 What I Liked:
Rock-solid and wobble-free connection
Fast to mount and unmount
Works perfectly with Swarovski’s digiscoping and phone adapter systems
Clean, minimalist build—no added bulk
👎 What I Didn’t:
Retrofit required for older models
Adapter only works with the 10x42 and 12x42 EL Range models
TA rings cost $134.99 each, which adds up quickly if you’re using multiple optics
Final Verdict
If you’re rocking the EL Range 10x42 or 12x42 and want a quick, secure digiscoping setup, the TA Adapter is an excellent option. But make sure your binos are compatible before purchasing, and be prepared for a potential delay if your optics need to be retrofitted overseas.
Despite the wait, the result was worth it: a fully integrated system that’s rugged, easy to use, and built for the backcountry.
Watch the Full Video
Want to see the full process, details, and how the system performs?
👉 Watch the EL Range Retrofit & TA Adapter Review on YouTube

OLLIN Snapshot System Review: Seamless Digiscoping with the iPhone 15 Pro Max and Multiple Optics
Discover how the OLLIN Snapshot System performs with the iPhone 15 Pro Max and top optics like the Swarovski STC, Vortex Viper, and Maven S.2. Full review, pros & cons, and pricing details included.
If you've ever tried capturing photos or video through your spotting scope or binoculars, you know how frustrating digiscoping can be. Most setups are clunky, hard to align, and waste valuable time when you’re trying to capture a fleeting moment. That’s why I was excited to get my hands on the OLLIN Snapshot System—and after putting it through its paces with my iPhone 15 Pro Max and several optics, I can confidently say: it works, and it works really well.
In this write-up, I’ll break down my experience testing the system with five different optics and share why the OLLIN might just be the easiest and most reliable digiscoping setup on the market today.
What Is the OLLIN Snapshot System?
The OLLIN Snapshot System is a magnetic digiscoping adapter built for mobile photographers and outdoor enthusiasts. It uses a precision-fit magnetic lens ring that goes over your optic’s eyepiece and a dedicated phone case that snaps into place magnetically. The result is a fast, simple way to align your phone camera with your spotting scope or binoculars—no screws, no clamps, no tools.
OLLIN offers smartphone cases tailored for popular models like the iPhone 15 Pro Max, which is what I used for all my testing.
Optics I Tested with the OLLIN Snapshot System
To get a feel for its versatility, I tested the system with the following gear:
The results were consistent across the board: the magnetic connection was strong, alignment was spot-on, and I was able to capture full-frame images and video within seconds of snapping the phone into place.
Real-World Performance
I tested the OLLIN system in varied conditions—ranging from handheld use to windy backcountry glassing—and it never missed a beat. Whether I was shooting video through the NL Pure or glassing distant elk with the STC, the system snapped on quickly, stayed secure, and delivered high-quality footage with minimal fuss.
Key Highlights:
iPhone 15 Pro Max Compatibility: The OLLIN case is sleek, MagSafe compatible, and rugged enough for field use.
Edge-to-Edge Clarity: With high-end glass like the Swarovski STC and NL Pure, I experienced almost no vignetting and full-frame image capture.
Fast Setup: The magnetic design means no fiddling, just align and shoot.
Stable Connection: Once attached, the phone stays firmly in place—even on uneven terrain or while repositioning.
The Price Factor
Here’s the catch: each individual lens ring costs $134.99. So while the system is ultra-convenient, it can get expensive quickly if you’re planning to outfit multiple optics. It’s a premium product, and that’s reflected in the price.
Pros
✅ Incredibly fast and intuitive setup
✅ Magnetic attachment is strong and reliable
✅ Compatible with a wide range of optics
✅ Clean, full-frame photos and videos
✅ Durable and MagSafe-compatible case
Things to Consider
🔸 Requires a dedicated phone case for your smartphone model
🔸 Each lens ring costs $134.99, which adds up if you're using multiple optics
🔸 Only compatible with optics that match the supported lens ring dimensions
Final Thoughts
The OLLIN Snapshot System is easily one of the best digiscoping solutions I’ve tested. If you’re serious about capturing content in the field—whether you’re a birder, hunter, wildlife photographer, or backcountry explorer—it’s an incredibly efficient tool. Yes, the cost of individual lens rings adds up, but the performance, convenience, and speed more than justify the investment for anyone who relies on clean, stable shots through high-end glass.
If you want to see the OLLIN in action with all the optics I mentioned, check out my full video review over on Ignited by Nature.
👉 https://youtu.be/x5mvCAva8GA?si=jpJEiGUDdXZtAKjq
Thanks for reading and remember to stay connected to the wild! If you found this article helpful, head over to the video, give it a like, and subscribe for more outdoor gear reviews and adventures. You can also follow me on social media and drop a comment to let me know what digiscoping setup you’re using.
— Chris
Ignited by Nature
🔗 Support the Channel and Blog: Every click and purchase made through my affiliate links—or any donation through my support page—helps keep this channel going. I don’t accept payment for reviews, so your support allows me to keep testing gear in the field and giving you honest, unbiased feedback.
Below are some of the best ways you can support the channel:
👉 Shop affiliate links: https://amzn.to/4dSJMDz
👉 Donate directly: https://www.ignitedbynature.com/support-me
👉 Buy a Hat: https://www.ignitedbynature.com/ignited-by-nature-store
👉 Buy our Popcorn: https://www.delopop.com
👉 Buy or sell a house with us: https://www.instagram.com/boisebound.realty
If you're more comfortable shopping on Amazon, here’s my Amazon affiliate link again: https://amzn.to/4dSJMDz But if the item is available through one of my non-Amazon affiliate links, using those helps me out even more.

Helinox Chair Zero Review: Ultralight Comfort for the Backcountry
The Helinox Chair Zero is one of the lightest and most packable camp chairs on the market, making it a go-to choice for ultralight backpackers, hunters, and backcountry adventurers. In this article, I break down its real-world performance, key specs, and pros and cons after extensive field use. If you’re debating whether the comfort is worth the weight—this review is for you.
When it comes to backcountry comfort, every ounce matters. That’s why the Helinox Chair Zero has earned a permanent spot in my ultralight setup. Whether you're glassing for elk, relaxing after a long hike, or sitting around a fire, having a real chair—without hauling pounds of extra gear—makes a huge difference.
In this post, I’ll cover the key features, pros and cons, and real-world performance of the Chair Zero, based on my own backcountry use.
🎥 Watch the Full Video Review
Click here to watch my YouTube review of the Helinox Chair Zero
(Embed the video here if possible for better engagement.)
Why the Helinox Chair Zero?
At just 1.1 pounds (490g) packed, the Chair Zero is one of the lightest portable chairs on the market—and that’s not just marketing hype. This chair delivers real comfort in the field without sacrificing packability or weight.
🔍 Key Specs
Weight: 1.1 lbs (490g)
Packed Dimensions: 13.8” x 3.9” x 3.9”
Assembled Dimensions: 20.5” wide x 19.7” deep x 25.2” high
Seat Height: 8.5”
Weight Capacity: 265 lbs (120 kg)
Material: DAC aluminum poles, ripstop polyester
Field Performance
I’ve used the Chair Zero on everything from scouting trips to multi-day hunts in rugged terrain. Here’s what stood out to me:
✅ Pros
Ridiculously Lightweight – At just over a pound, it disappears into your pack.
Compact – Packs down smaller than a Nalgene bottle.
Quick Setup – The frame self-assembles and the seat slips on in seconds.
Surprising Comfort – You sit low, but it cradles you well and keeps you off cold, wet, or rocky ground.
Durable Materials – DAC aluminum poles are tough and reliable even in rough terrain.
❌ Cons
Low to the Ground – Not ideal if you have knee issues or want a higher seating position. Also if you are over 6ft you might find this chair uncomfortable.
No Head Support – You’re sitting back, but this isn’t a lounger.
Price – It’s not cheap, and there are knockoffs out there—but you get what you pay for.
Who Is This Chair For?
The Helinox Chair Zero is for ultralight backpackers, hunters, hikers, and bikepackers who want real comfort at camp without loading up their pack. If you value minimalism without compromise, this chair delivers.
Alternatives Worth Considering
Helinox Chair One – Slightly heavier but more stable and supportive.
Nemo Moonlite Elite Reclining Chair – Similar design, has the option to recline..
Therm-a-Rest Z Seat – If you want the absolute lightest way to sit, this closed-cell foam pad is a dirt-cheap option (but lacks the comfort of a full chair).
Final Thoughts
If comfort is part of your backcountry game plan, the Helinox Chair Zero is a solid investment. It’s pricey, yes—but for me, the weight savings and ease of use are worth every penny. Especially after a 12-mile hike with a heavy pack, being able to kick back in a real chair? That’s priceless.
🛒 Where to Buy + Affiliate Links
If you want to support my channel and get yourself an awesome ultralight chair, you can grab one through the affiliate links below:
👉 Helinox Chair Zero – Amazon
👉 Helinox Chair Zero – Backcountry
👉 Helinox Chair Zero
Using these links helps me keep making honest, unsponsored outdoor gear reviews—at no extra cost to you.
📸 Follow My Adventures
Follow me for more reviews and real-world outdoor testing:
Instagram: @ignitedbynature
Website: www.ignitedbynature.com
Delopop Popcorn (my wife’s all-natural snack company): Delopop
Boise Bound Realty: Instagram
🧭 Stay Connected to the Wild
Thanks for reading! If you enjoyed this article or found it helpful, drop a comment below and let me know your favorite camp chair or what you’re carrying into the backcountry.
Until next time—stay connected to the wild.
– Chris, Ignited By Nature

Layer Right, Stay Warm & Comfortable: Essential Clothing for Spring, Fall, & Late-Season Adventures
Perched on a mountain ridge at sunrise, layered up and ready to go—this shot captures the essence of early-morning backcountry adventure and the critical role a well-built layering system plays in staying warm, dry, and prepared.
When you're miles deep into the backcountry, freezing your butt off isn't just uncomfortable—it can be dangerous. Whether you're glassing for elk in the high country, trudging through cold spring mud, or sitting in a late-season treestand, layering your clothing system correctly makes all the difference between tapping out early and thriving in the elements.
In this article, I’ll walk you through a tried-and-true approach to layering for backcountry hiking and hunting during spring, fall, and winter. This article pairs with my YouTube video where I show my actual gear and setups, so if you're more of a visual learner, be sure to check that out too.
Why Layering Matters
Layering isn't just about piling on clothes until you're warm. It's about regulating moisture, retaining warmth, and staying mobile. Done right, a proper layering system lets you adapt quickly to shifting weather, terrain, and activity levels—something that’s absolutely critical in unpredictable mountain conditions.
A solid layering system typically consists of the following:
Base Layer: Moisture management
Mid Layer: Insulation
Outer Layer (Shell): Weather protection
Optional Layers: Puffies, vests, wind shirts, or rain gear depending on your environment and activity
1. Base Layer – Keep That Sweat Off Your Skin
Your base layer is your foundation. It’s the first thing you put on and the last thing you want to fail. The job of your base layer is to wick sweat off your body to keep you dry and prevent chill during low activity.
Best Picks:
Lightweight merino wool or synthetic blend for spring/fall
Midweight merino for colder or late-season days
Full-length bottoms for freezing temps, ¾ zip-off bottoms for mobility and moisture control
Pro Tip: Avoid cotton like the plague if you're going out for more than a day. Once it’s wet, it stays wet—and cold.
2. Mid Layer – Trap the Heat
Your mid layer provides insulation and should be easy to adjust or shed as you warm up or cool down. This is where your warmth really starts to build, and layering here can be strategic based on your activity level and weather.
Spring/Fall:
Grid fleece or lightweight active insulation like the Sitka Ambient or Patagonia R1
Fleece vest or wool hoody for breathability and warmth
Late-Season:
Thicker fleece, Merino/Synthetic blend fabrics or heavier grid insulation
Insulated vests to keep your core warm without restricting arm movement are also a great option.
Pro Tip: Think of this layer like a thermostat—easy to put on and easy to dump heat if you start to sweat.
3. Insulation Layer – Stop the Heat Loss
This is your “take a break” or “glass for a while” layer. When you’re stopped and your core temp starts dropping, this is what you throw on over your mid layer.
Options I Use:
Down puffy jacket (ultralight for shoulder seasons, heavier for winter)
Synthetic insulation for wet conditions (less compressible but stays warm when wet)
Down pants for glassing in frigid weather or sitting in a stand
Pro Tip: Store your insulation layer in a compression sack in your pack and only use it when stationary to avoid sweating in it.
4. Shell Layer – Block Wind, Rain, and Snow
This is your armor against the elements. A good shell will keep wind, snow, and rain from cutting into your insulation. It doesn’t need to be heavy, but it does need to breathe.
Spring/Fall:
Windbreaker or softshell (for dry but breezy days)
Lightweight rain jacket if you expect storms
Late-Season:
Waterproof breathable hard shell (e.g., Gore-Tex or equivalent)
Hardshell pants with side zips for venting on the move
Pro Tip: If you're in brushy terrain, get a shell that’s durable and quiet—nothing worse than loud, crunchy fabric when you're stalking game.
5. Accessories – Don’t Forget Your Extremities
If your head, hands, or feet are cold, you’re going to feel it no matter how dialed the rest of your system is.
Must-Haves:
Merino or fleece beanie
Neck gaiter or balaclava
Glove system (liner + insulation + waterproof shell)
Wool socks + backups
Gaiters (especially in snow or wet grass)
Late-Season Add-ons:
Hand warmers in pockets
Insulated booties for glassing sessions
Over-mitts or muff for long sits
How to Adapt Based on the Season
Spring:
Expect wet conditions. Focus on quick-drying fabrics and lightweight waterproof layers.
Temperatures can swing wildly—layer up in the morning and strip down quickly once moving.
Fall:
Cooler temps and dry air make it the sweet spot for layering.
Emphasize breathability and flexibility, especially during active hunts or long hikes.
Late-Season/Winter:
Prioritize warmth and wind protection.
Don’t skimp on insulation layers, and always have an emergency backup like a heavier puffy or bivy sack.
Real Talk: Layering Isn't Glamorous—It's Survival
I’m not here to sell you the latest ultralight trendy gear. I’m here to help you stay alive and stay comfortable when the weather goes sideways. I’ve tested these systems on countless hunts and backcountry trips—many of which didn’t go as planned. The wrong layering system can end a trip early or worse, while the right one helps you push deeper, stay longer, and perform better.
If you want to see exactly what I wear and how I pack it, be sure to check out the full video here. I break it down layer by layer and share some of my go-to pieces for every season.
Final Thoughts
Dialing in your layering system is one of the most important things you can do as a backcountry hunter or hiker. It doesn’t have to be the most expensive gear on the market—but it does have to work. Know your environment, stay adaptable, and always plan for worse weather than you expect.
Thanks for reading—and remember to stay connected to the wild.
If you found this article helpful, check out the video for the full breakdown, and don’t forget to subscribe on YouTube for more outdoor gear reviews and backcountry advice. You can also follow me on any of the woke media outlets—I mean, social media platforms—if you haven’t already. Leave a comment below and let me know how you layer for your hunts!
Until next time,
– Chris, Ignited By Nature

The Ultimate Guide to Choosing Backcountry Footwear
The wrong boots can ruin your hunt. The right ones will carry you farther than you thought possible.
Discover how to choose the best backcountry footwear—from trail runners to mountain-ready boots—and get my personal gear picks for every season.
Whether you're trekking deep into the wilderness for a multi-day hunting trip or planning a long-distance backpacking adventure, choosing the right backcountry footwear can make or break your experience. Blisters, sore arches, wet socks, and rolled ankles are not just annoyances—they're potential trip-enders.
In this guide, I’ll break down exactly how to choose the best boots or shoes for your needs, the pros and cons of different footwear types, and how to match your choice to your terrain, season, and pack weight. Plus, I’ll share the exact footwear I use in different seasons and situations.
Why Footwear Matters in the Backcountry
When you're miles away from the trailhead, comfort and foot protection become critical. Your footwear isn't just about keeping your feet warm and dry—it's a crucial part of your overall performance, safety, and ability to stay in the field longer.
Here’s what the right pair of boots will offer:
Support for carrying a heavy pack
Protection from sharp rocks, roots, and brush
Stability across uneven terrain
Water resistance or breathability, depending on the season
Durability to withstand hundreds of miles
Types of Backcountry Footwear
1. Trail Runners
Best For: Fast-and-light backpacking, summer hiking, ultralight setups
Pros: Lightweight, breathable, quick-drying
Cons: Less support, poor durability with heavy loads or rugged terrain
My Pick: I use the Brooks Adrenaline GTS for lightweight scouting trips and early-season outings. They’re stable, well-cushioned, and provide just enough support when I’m not carrying a full load. They’re also breathable and dry quickly after creek crossings or rain.
2. Hiking Shoes
Best For: Moderate trails, day hikes, or shorter backpacking trips
Pros: More durable and supportive than trail runners, still relatively lightweight
Cons: Limited ankle support, not ideal for rough or off-trail use
3. Hiking Boots (Mid-Cut)
Best For: General-purpose hiking and light to moderate backpacking
Pros: Good ankle support, water resistance, and comfort
Cons: Heavier than shoes, longer break-in time
4. Backpacking Boots (High-Cut / Full Leather)
Best For: Off-trail terrain, rugged routes, heavy pack loads, hunting trips
Pros: Excellent support and durability, great protection
Cons: Heavier, requires proper break-in, less breathable
Pro Insight: If you're hauling meat or gear in rough, remote terrain, a burly leather or synthetic boot with a stiff sole is your best friend.
Factors to Consider
1. Terrain
Rocky, technical, or brushy terrain demands more protection and ankle support.
Well-maintained trails may allow for lighter options.
2. Pack Weight
The heavier your pack, the stiffer and more supportive your footwear should be.
For 40+ lb packs, look at mountaineering-grade or high-stiffness boots.
3. Season and Weather
Summer: Breathability matters. Consider mesh or ventilated designs.
Spring/Fall: Waterproofing and insulation become more critical.
Winter: You may need boots compatible with gaiters or crampons.
4. Boot Flex Rating
Manufacturers often rate boots by flex (1 = soft/flexible, 5 = stiff):
Flex 1–2: Ideal for trail runners and hiking shoes
Flex 3: Great for general backcountry use
Flex 4–5: Best for alpine routes, heavy loads, and technical terrain
The Game-Changer: Custom Insoles
Here’s something I highly recommend—custom orthotics or upgraded insoles.
Personally, I use Superfeet insoles with extra arch support, and they’ve been a game-changer for me. They give me the structure I need for long days under load and—here’s the crazy part—they’ve basically eliminated the break-in period for my boots. That alone saves me weeks of sore feet and hotspots every season.
If you’ve struggled with arch pain, fatigue, or inconsistent fit in your boots, try swapping the stock insoles out before replacing the boots entirely.
My Personal Boot Picks
When it comes to boots, here’s what I wear and trust for serious backcountry use:
For Cold Weather and Heavy-Duty Use:
Crispi Nevada – My go-to for rugged terrain and mid-to-late season hunting. They're supportive, breathable for a full-leather boot, and built to last.
Crispi Wild Rock GTX – A powerhouse insulated boot designed for cold-weather hunts. They keep my feet warm even in sub-freezing temps and deep snow without sacrificing performance or comfort.
Both pairs work especially well with my Superfeet orthotics, which I consider non-negotiable for long trips.
Final Thoughts
Choosing the right backcountry footwear isn’t just about brand or style—it’s about understanding your needs, terrain, and how your gear all works together. A great boot is an investment in your comfort, mobility, and safety.
And don’t forget: your insoles matter just as much as the boots themselves.
If you haven’t already, check out my full video guide on YouTube where I go even deeper into how I pick boots for each type of trip and show you some real-world examples from my hunts and backpacking adventures.
Stay Connected to the Wild
Thanks for reading and remember to stay connected to the wild! If you found this guide helpful, hit that like button and subscribe for more outdoor gear reviews and adventures. You can also follow me on any of the woke media outlets—I mean, social media platforms—if you haven’t already. Also, leave a comment below if you want to share your thoughts or tell me what boots you’re using.
Once again, I’m Chris with Ignited by Nature.
Until next time, guys and gals!

Outdoor Gloves 101: How to Pick the Perfect Pair for Cold Weather Adventures
Hey there guys and gals, this is Chris with Ignited by Nature—and today, we’re diving into a topic that’s often overlooked until your fingers start freezing: outdoor gloves.
Whether you’re hunting, hiking, backpacking, chopping wood at camp, or just trying to stay warm during a snowy day, the right pair of gloves can make all the difference between a great time outdoors and a miserable one. In this post, I’ll walk you through how to pick the perfect pair of gloves based on weather, activity, materials, insulation, and a few pro tips I’ve picked up in the field.
Let’s dive in.
1. Understand the Types of Outdoor Gloves
Not all gloves are created equal—and no single pair does it all. Here’s a quick breakdown:
🧤 Liners
Thin, lightweight, and moisture-wicking.
Great as a base layer or for high-output activities.
Not windproof or waterproof on their own.
🧤 Insulated Gloves
Designed for cold weather.
Filled with down or synthetic insulation.
Ideal for stationary or low-movement activities like glassing or treestand hunting.
🧤 Softshell Gloves
Breathable and somewhat water-resistant.
Great for active pursuits like hiking or backcountry skiing.
🧤 Waterproof Gloves
Feature a membrane like Gore-Tex.
Keep your hands dry in snow or rain.
Often bulkier and less breathable.
🧤 Mitts & Lobster Gloves
Combine fingers for maximum warmth.
Mitts are warmer than gloves, but reduce dexterity.
Lobster gloves are a hybrid (think 3-finger design) and offer a balance between warmth and function.
2. Consider the Activity
Your glove needs will change based on what you’re doing:
Backpacking or hiking? Go with a liner or light softshell glove for breathability and comfort.
Cold-weather hunting or glassing? You’ll want an insulated glove or mitt, ideally one that allows for dexterity with a trigger or binoculars.
Mountaineering or skiing? Waterproofing and wind protection become non-negotiable.
Bushcraft, chopping wood, or fire-starting? You might want a durable leather glove with good abrasion resistance.
3. Know Your Insulation
Glove warmth depends on what’s inside:
🔥 Synthetic Insulation (e.g. Thinsulate, Primaloft)
Retains warmth even when wet.
Dries faster than down.
More affordable.
🔥 Down Insulation
Lightweight and ultra-warm.
Compressible for packability.
Loses warmth when wet—best in dry, cold conditions.
🔥 Fleece-lined
Good for shoulder seasons.
Comfortable and warm for moderate cold.
4. Think in Layers
Just like with clothing, layering works with gloves too. My typical setup includes:
A thin liner glove for dexterity and high-output use.
A mid-layer glove or mitt for insulation.
A shell or waterproof glove I can throw on when the weather turns nasty.
You can mix and match depending on your activity and weather conditions.
5. Fit, Dexterity & Grip
A glove should fit snugly, but not cut off circulation. Too tight and you’ll get cold; too loose and you’ll lose dexterity.
Look for:
Articulated fingers for better movement.
Grip materials on the palm (great for trekking poles, bows, or camera gear).
Touchscreen compatibility, if you’re using GPS or taking photos.
6. Don’t Forget About Wrist Closures & Cuffs
A long gauntlet-style cuff keeps snow and wind out, while a short cuff fits under your jacket. Adjustable wrist strapshelp keep the glove secure and the warmth locked in.
Chris’s Pro Tips:
Bring two pairs: One for activity, one for camp or glassing.
Pack hand warmers inside your mitts on especially cold days.
If you sweat a lot, carry a backup liner so you can swap out damp gloves.
Don’t forget to test them with your gear—can you draw your bow, work your optics, or use your stove with them on?
Final Thoughts
The perfect glove doesn’t exist—but the perfect glove system for your adventure does. With the right layering approach, proper fit, and an understanding of what your activity demands, you can keep your hands warm, dry, and functional in any conditions.
If you want to see some of my favorite gloves in action—and how I personally layer them in everything from summer hikes to late-season hunts—be sure to check out the full video:
🎥 Watch: Outdoor Gloves 101 – How to Pick the Perfect Pair
And as always…
Thanks for reading and remember to stay connected to the wild! If you found this article helpful, be sure to subscribe to my YouTube channel for more outdoor gear reviews and adventures. You can also follow me on any of the woke media outlets—I mean, social media platforms—if you haven’t already. Let me know in the comments what gloves you're using or if you have a favorite layering system. Once again, I’m Chris with Ignited by Nature. Until next time, guys and gals!

Savage 110 7mm Rem Mag Upgrade with the MDT LSS Gen 2 Chassis – Full Breakdown
Upgraded Savage 110 chambered in 7mm Remington Magnum, featuring the MDT LSS Gen2 chassis and tested in snowy backcountry conditions. This precision build combines long-range performance with modular versatility—ideal for shooters looking to enhance stability, accuracy, and ergonomics.
If you’ve been eyeing a serious upgrade to your Savage 110 in 7mm Rem Mag, I recently completed a full chassis conversion using the MDT LSS Gen 2 — and let me tell you, this setup takes the rifle to a whole new level in both performance and aesthetics.
In this blog, I’ll walk you through the build, why I chose the MDT LSS Gen 2, and how the upgrades have impacted weight, accuracy, and usability—especially for those of you considering using this setup for benchrest shooting or long-range hunting.
⸻
Why Upgrade the Savage 110?
The Savage 110 is already a solid platform out of the box, especially with its factory AccuTrigger and button-rifled barrel. But if you’re like me and want to stretch its capabilities—both on the bench and in the backcountry—it’s worth considering some performance upgrades.
The biggest limitation of the stock setup is ergonomics and modularity. That’s where MDT’s chassis systems come in, offering massive improvements in both.
⸻
MDT LSS Gen 2 Chassis – Why I Chose It
The MDT LSS Gen 2 is a lightweight, minimalist chassis built from aircraft-grade aluminum and designed for maximum compatibility with AR-style components. I went with this model because:
• It supports AICS pattern mags
• It allows AR-style grips and buttstocks
• It’s lightweight (relatively speaking) while still rigid
• It provides better bedding and accuracy potential than factory stocks
⸻
Key Features of the Build
Here’s the full build I’m running right now:
• Chassis: MDT LSS Gen 2
• Stock: MDT SCS-Lite Skeleton Carbine Stock (via MDT Folding Stock Adapter)
• Grip: Ergo Tactical AR grip
• Optic: Nightforce SHV 3-10x42
• Bipod: Magpul 1913 Bipod
• Barrel: Factory carbon steel, non-fluted
• Weight: 12.7 lbs (with scope and bipod)
Yes, this setup is heavy—but that’s intentional. I designed this to be a stable benchrest or long-range shooter, not a mountain rifle.
⸻
Performance Gains
1. Ergonomics:
The AR-style grip and adjustable stock give me a more natural shooting position and better control on the bench.
2. Stability:
The chassis adds serious rigidity, which translates into more consistent groups. The Magpul bipod is rock solid, and the full setup balances well despite the weight.
3. Modularity:
I love being able to swap out grips and stocks. This system can evolve as my needs change, and that’s a huge plus for long-term value.
4. Accuracy:
With the factory barrel and match-grade ammo, I’m consistently seeing sub-MOA groups at 100 yards. I’ll be testing more handloads soon to tighten those even further.
⸻
The Tradeoffs
- Weight: At 12.7 lbs, this isn’t the rifle you want to pack into the backcountry for 10 miles. But for range days, target shooting, or setting up in a fixed hunting position, it’s perfect.
- Cost: Between the chassis, stock, adapter, bipod, and optic, this build gets expensive fast. But compared to a full custom rifle, it’s still a great value.
- Fitment: Some minor fitting may be required depending on your factory action. I didn’t run into major issues, but be prepared to do some minor tweaks or bedding.
⸻
Total Build Cost – Under $2,000
One of the best parts about this build? The entire rifle setup—including the scope—came in just under $2,000.
That’s everything:
• The Savage 110 7mm Rem Mag
• MDT LSS Gen 2 Chassis
• MDT Folding Stock Adapter
• MDT SCS-Lite Skeleton Carbine Stock
• Ergo Tactical AR Grip
• Magpul 1913 Bipod
• Nightforce SHV 3-10x42 Optic
For shooters looking to upgrade without diving into custom gunsmithing or blowing $3–5K on a premium rifle, this is a killer setup that punches way above its price point. You’re getting modern ergonomics, better accuracy, and a highly modular platform—all for less than many factory “precision” rifles cost off the shelf.
⸻
Final Thoughts
This Savage 110/MDT LSS Gen 2 chassis build transformed a solid hunting rifle into a highly capable precision shooter. Whether you’re building a long-range hunting rig, a bench gun for range days, or just want a rock-solid platform you can continue to customize, this setup delivers serious value and performance without breaking the bank.
If you’re willing to do some research and carefully select your components, you can absolutely build a sub-MOA rifle under $2,000—and this Savage 110 project proves it.
⸻
Watch the Full Video
If you haven’t seen the full video breakdown yet, check it out here:
📺 [YouTube Video Link]
⸻
Gear List
Here’s a quick breakdown of the parts I used in this build. (Feel free to use affiliate links here.)
• MDT LSS Gen 2 Chassis – Short Action
• Nightforce SHV 3-10x42 Scope
⸻
Closing
Thanks for reading, and remember to stay connected to the wild! If you found this blog helpful, be sure to subscribe to my YouTube channel for more gear reviews and build breakdowns. You can also follow me on any of the woke media outlets—I mean, social media platforms—if you haven’t already.
Until next time, guys and gals – I’m Chris with Ignited by Nature.

NL Pure 12x42 Long Term Review.
Swarovski NL Pure 12x42 binoculars mounted on a Peak Design tripod in a backcountry field review setup
Swarovski NL Pure 12x42 Review: Premium Performance with a Wider View
Hey there guys and gals, this is Chris with Ignited by Nature—and today we’re diving into one of the finest binoculars ever made: the Swarovski NL Pure 12x42. If you’ve followed my content for a while, you know I don’t throw around words like “best” lightly. But after putting these through the paces—from glassing elk at sunrise to scouting ridgelines for hours—they’ve earned their place at the top of my optics lineup.
Whether you’re a backcountry hunter, wildlife photographer, or just someone who appreciates the pinnacle of optical performance, the NL Pure 12x42 offers a viewing experience that’s hard to match.
⸻
The NL Pure Series: What Makes It Special?
Swarovski introduced the NL Pure line as a step above their iconic EL binoculars. The goal? Maximize the field of view, minimize the housing, and deliver razor-sharp clarity from edge to edge.
The NL Pure 12x42 takes that vision and packs it into a well-balanced chassis with 12x magnification and 42mm objective lenses—a sweet spot for those who want more reach without jumping up to a 15x class.
⸻
Key Specs
• Magnification: 12x
• Objective Lens: 42mm
• Field of View: 339 ft @ 1,000 yds (6.5°)
• Close Focus: 6.6 ft
• Eye Relief: 18 mm
• Weight: 30 oz (850 g)
• Length: 6.2 inches
• Waterproof: Yes (submersion tight up to 13 ft)
• Warranty: 10-year unconditional (plus 1 extra year when registered online)
⸻
First Impressions
Right out of the box, the NL Pure 12x42 screams quality. The finish is flawless, the focus wheel is butter-smooth, and the ergonomic design hugs your hands in a way that makes prolonged glassing surprisingly comfortable—even at 12x.
Unlike older models, the NL Pure’s wasp-waist design actually molds to your grip, and you’ll feel it immediately. Combined with Swarovski’s excellent balance, they’re easier to handhold than most 12x binoculars.
⸻
Optical Performance
This is where the NL Pure shines. The edge-to-edge clarity is unmatched. There’s virtually no drop-off in image sharpness near the edges, which is rare in high-magnification binos.
The 12x magnification offers serious reach, but without the bulk and shakiness typically associated with higher-power binos—especially when mounted on a tripod. Colors are natural, contrast is excellent, and there’s no noticeable chromatic aberration, even when glassing at long distances.
In low light, they perform extremely well. During dawn and dusk, I was still able to resolve detail clearly while other optics started to fade.
⸻
Tripod Use: Strongly Recommended
While the NL Pure 12x42 is relatively easy to handhold for its power, I highly recommend using them on a tripod. Freehand glassing can get shaky at 12x, and it’s easy to lose your subject, especially when trying to pick apart dense timber or scan a ridgeline.
For serious sessions, a tripod allows you to take full advantage of the resolution and clarity these binos offer.
⸻
Ergonomics and Handling
Weighing just under 30 oz, the NL Pure 12x42 is light for a 12x optic—but it’s the balance and grip shape that really make it feel nimble in the field.
The focus wheel is oversized, silky smooth, and precise—even with gloves on. And while eyecups are removable, they can sometimes become loose or fussy, especially when dust or grime gets into the threads. If you find your eyecups spinning too freely or not locking into place, try removing them completely and giving the area a thorough cleaning. It usually solves the issue.
⸻
Field Use & Durability
In the field, these binos impressed me with their comfort, image quality, and ruggedness. I’ve used them in snow, rain, and dusty windstorms—and they’ve never let me down.
They also fit perfectly in a medium-sized Marsupial bino harness, which is a big plus. No need to upsize just because you’re running a 12x.
And here’s a detail that doesn’t get mentioned enough: Swarovski’s customer service is absolutely top-notch. In the rare event you need help—whether it’s your fault or not—they’ve got your back. I’ve never had to pay for a repair, even when I was the one who messed something up.
⸻
Pros and Cons
✅ Pros
• Insane edge-to-edge clarity
• Wide FOV for a 12x (339 ft @ 1,000 yds)
• Lightweight and extremely ergonomic
• Excellent low-light and color performance
• Smooth focus wheel (glove-friendly)
• Fits medium bino harness
• Outstanding customer service
• 10-year unconditional warranty (+1 year if registered)
❌ Cons
• High price (~$3,399 USD)
• Forehead rest not included
• Tripod is almost essential for steady glassing
• Eyecups can come loose or get sticky if dirty (needs occasional cleaning)
⸻
Final Thoughts
If you’re in the market for top-tier glass and want the power of a spotting scope with the comfort and speed of binoculars, the Swarovski NL Pure 12x42 is as good as it gets.
It’s not just a piece of gear—it’s an investment in better decisions in the field, better experiences, and ultimately more success, whether that’s punching a tag or capturing once-in-a-lifetime moments.
If you want absolute optical performance, and don’t mind pairing it with a tripod, the NL Pure 12x42 is a backcountry dream.
⸻
Closing
Thanks for reading, and remember to stay connected to the wild! If you found this article helpful, check out the full video review on my YouTube channel, Ignited by Nature, and don’t forget to subscribe for more outdoor gear reviews and backcountry adventures. You can also follow me on any of the woke media outlets—I mean, social media platforms—if you haven’t already.
Once again, I’m Chris with Ignited by Nature. Until next time, guys and gals!

Zero, Fifteen or Thirty-two: Which Stone Glacier Chilkoot is Right For You?
Stone Glacier Chilkoot Series
0°, 15°, or 32° – Which One Fits Your Hunt?
Ultralight Performance. Backcountry Tested.
👉 Watch the Full Breakdown
When it comes to backcountry sleep systems, your sleeping bag can be the difference between a restful night and a miserable one. Stone Glacier offers a range of Chilkoot sleeping bags and quilts designed specifically for hunters and serious backpackers, but which one is the right fit for your needs?
In this article, we’ll break down the Stone Glacier Chilkoot 0°, 15°, and 32° quilt to help you decide which one is best for your next adventure—whether you’re chasing elk in sub-freezing temps or fastpacking in the summer heat.
Stone Glacier Chilkoot 0° Sleeping Bag
Best For: Late-season hunts, deep winter expeditions, high alpine cold
Fill: 850+ fill power goose down
Weight: ~2 lbs 11 oz
Comfort Limit: Around 0°F
If you're hunting in cold weather, the Chilkoot 0° is your fortress. This bag offers serious warmth with minimal weight thanks to its 850+ fill down and Pertex® Quantum shell. It's built for late-season rifle hunts, subalpine excursions, or even shoulder-season trips where the temps can drop unpredictably.
Pros:
Warm enough for single-digit and sub-zero temps
Vertical baffles keep insulation from shifting
Generous footbox and anatomical shape
Lightweight for a 0° bag
Cons:
Overkill for mild temps
Heavier and bulkier than the others
Stone Glacier Chilkoot 15° Sleeping Bag
Best For: Mid-season hunts, high country archery, shoulder seasons
Fill: 850+ fill power goose down
Weight: ~2 lbs 6 oz
Comfort Limit: Around 15°F
The Chilkoot 15° is the most versatile in the lineup. It’s warm enough for frosty mornings but light enough to carry for miles. If you want a single bag that’ll handle everything from September archery elk hunts to October mule deer in the Rockies, this is likely the best pick.
Pros:
Great warmth-to-weight ratio
Ideal for most backcountry hunts
Packs smaller than the 0°
Built-in draft collar and full-length zipper
Cons:
Not enough insulation for true winter use
May be too warm for summer
Stone Glacier Chilkoot 32° Quilt
Best For: Ultralight summer trips, early-season scouting, fastpacking
Fill: 850+ fill power goose down
Weight: ~1 lb 5 oz
Comfort Limit: Around 32°F
For ultralight backpackers and early-season hunters, the Chilkoot 32° quilt is a minimalist dream. It ditches the traditional mummy bag shape for an open quilt style, saving both weight and space. Pair it with a good pad and you’re golden for warmer conditions.
Pros:
Extremely lightweight
Packs down tiny
Great for hot sleepers
Offers more freedom of movement
Cons:
Not suitable below freezing unless layered
Requires a warm sleeping pad to perform well
No hood, draft protection is pad-dependent
So, Which One Should You Choose?
Here’s a quick breakdown depending on your typical conditions:
Cold Weather & Winter Hunts: Go with the Chilkoot 0°
General Backcountry Use (Spring-Fall): The Chilkoot 15° is your best bet
Warm Weather & Ultralight Missions: The Chilkoot 32° Quilt is ideal
Final Thoughts
Choosing the right sleep system isn’t just about temperature ratings—it’s about matching the bag or quilt to your style of adventure. The Chilkoot line from Stone Glacier is purpose-built for hunters who push deep into the backcountry. Pick the right model, and you’ll sleep better, recover faster, and hunt harder.
Watch the Full Breakdown
If you haven’t already, be sure to check out my in-depth video review:
Zero, Fifteen or Thirty-two: Which Stone Glacier Chilkoot is Right For You?
I show real-world footage, share personal insights from the field, and help you make the best decision possible.
Thanks for reading and remember to stay connected to the wild! If you found this article helpful, hit that like button and subscribe to my YouTube channel for more outdoor gear reviews and adventures. You can also follow me on any of the woke media outlets—I mean, social media platforms—if you haven’t already. Let me know in the comments what sleep system you’re using or considering. Once again, I’m Chris with Ignited by Nature. Until next time, guys and gals!
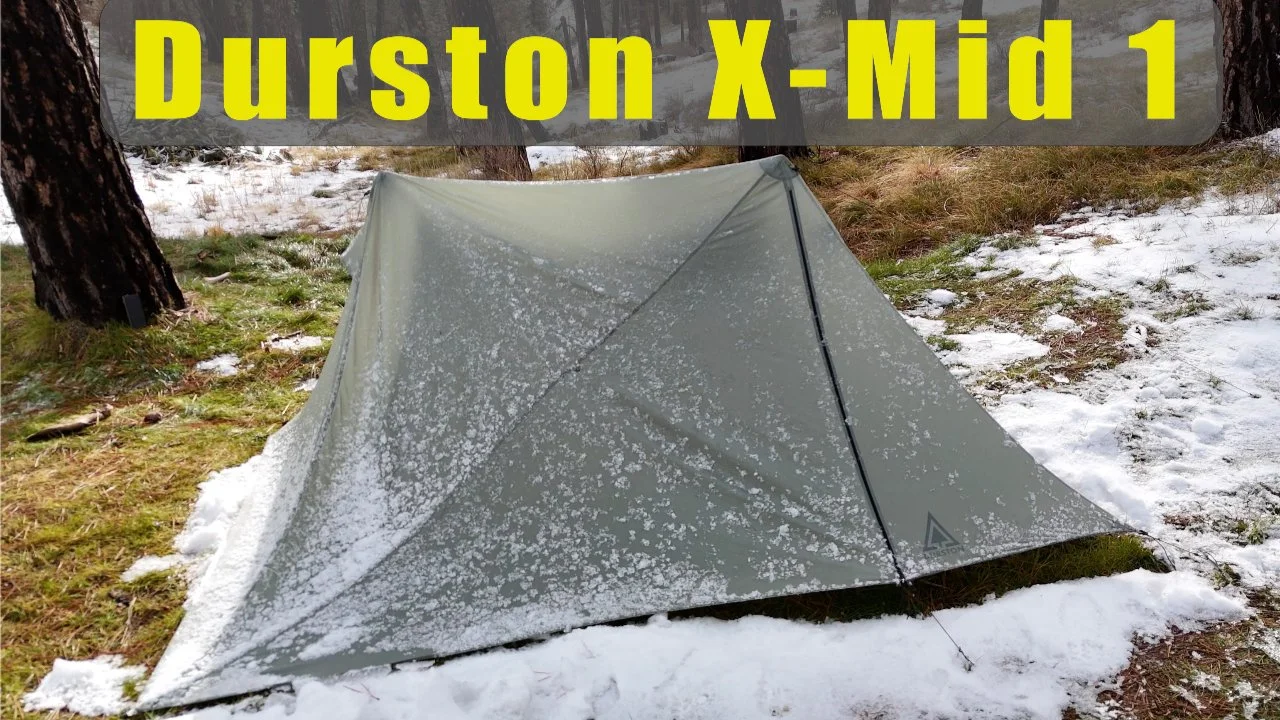
Durston X-Mid 1 Tent Review: The Ultimate Solo Shelter for Backpackers
Ultralight. Stormproof. Surprisingly Spacious. The Durston X-Mid 1 sets a new standard for solo shelters.
Hey there guys and gals, this is Chris with Ignited by Nature—and today we’re diving deep into one of the most talked-about solo backpacking tents in recent years: the Durston X-Mid 1, standard polyester version.
This tent has earned a cult following for good reason—it’s ultralight, stormworthy, user-friendly, and doesn’t break the bank. I’ve put this shelter through the wringer across different conditions, and today, I’m laying out the pros, cons, specs, and who this tent is really for.
⸻
Quick Specs
• Weight: ~31 oz (880g) without stakes or poles
• Material: 20D polyester with PU coating (non-silnylon, non-DCF)
• Floor Dimensions: 90” x 32” (tapers slightly)
• Peak Height: 45”
• Packed Size: 12” x 5”
• Price: ~$234 USD
⸻
What Makes the X-Mid 1 Special?
1. Trekking Pole Pitch with a Twist
The X-Mid 1 is a trekking pole tent, but it’s not your average A-frame. Instead of pitching front-to-back, it pitches diagonally. That gives it a surprisingly spacious interior without increasing the footprint or adding weight. The dual offset poles create vertical sidewalls, steep roof angles for shedding rain or snow, and better interior livability than most 1-person tents.
2. Storm-Ready Design
The geometry of this tent isn’t just clever—it’s effective. The steep walls and guyout points allow it to handle wind and rain like a champ. Unlike many ultralight shelters, the X-Mid doesn’t flap like a tarp in bad weather. And thanks to its polyester fabric, you don’t get the sagging that’s common with silnylon when it gets wet.
3. Fast and Frustration-Free Setup
One of my favorite features? The pitch. This thing goes up fast—just four stakes for a basic pitch, and you can fine-tune it with additional guy lines if needed. Even on uneven ground, the rectangular floor and adjustable corner tensioners make the setup intuitive.
⸻
Interior Space & Livability
Despite being a one-person tent, the X-Mid 1 feels roomy. Here’s what you get:
• No pole in your face: The offset design moves the poles away from your sleeping area.
• Plenty of length: At 90 inches, taller hikers won’t feel cramped.
• Two doors & two vestibules: Rare for a solo tent at this weight, the dual vestibules offer gear storage, cross-ventilation, and entry/exit versatility.
Pro tip: On rainy days, you can cook under one vestibule while keeping the other dry for gear access.
⸻
Ventilation and Condensation
Like all single-wall tents, the X-Mid 1 can accumulate condensation under the right conditions. But Dan Durston clearly thought this through. The tent has:
• Large mesh interior panels
• Dual peak vents
• Dual vestibule doors you can open partially for crossflow
These all help keep moisture buildup manageable, even in humid or shoulder-season conditions.
⸻
Durability & Materials
This standard version uses 20D polyester, which is more stretch-resistant and UV-resistant than nylon. While it’s not bombproof, it hits a sweet spot between durability and packability. The bathtub floor is also reinforced to hold up to backcountry wear and tear.
Would I take this through extended bushwhacking? No. But for trail-based travel, alpine missions, or even mild winter use, it holds up extremely well.
⸻
What I Like
✅ Lightweight without sacrificing durability
✅ Stormworthy pitch and shape
✅ Surprisingly roomy for a solo shelter
✅ Dual vestibules and doors = excellent usability
✅ Affordable compared to DCF alternatives
✅ Doesn’t sag when wet like silnylon tents
⸻
What I Don’t Like
❌ Single-wall construction means condensation management is key
❌ Rectangular footprint can take more space to pitch than a pyramid tent
❌ Not freestanding – needs decent ground for trekking pole support
⸻
Who Is the X-Mid 1 For?
The Durston X-Mid 1 is ideal for:
• Ultralight backpackers who want a balance of comfort, protection, and price
• Thru-hikers and section hikers looking for low-maintenance shelters
• Minimalists who don’t want to fuss with complex pitches
• Anyone sick of tents that sag in the rain
It may not be the best choice for alpine mountaineering or technical four-season trips, but for most three-season adventures? It’s hard to beat.
⸻
Final Thoughts
The Durston X-Mid 1 lives up to the hype. It’s not just another trendy ultralight shelter—it’s a thoughtfully engineered piece of gear that actually performs in the wild. For solo adventurers looking for reliability, ease of use, and real-world comfort, this tent checks all the right boxes.
⸻
Thanks for reading and remember to stay connected to the wild!
If you found this review helpful, feel free to share it or drop a comment below. And if you’re looking for more detailed gear reviews and outdoor insights, check out my YouTube channel, Ignited by Nature.
Until next time, stay wild.

How to Buy Preference Points in Wyoming for Future Hunts
New to preference points? Curious about hunting in Wyoming as a non-resident? This article breaks down everything you need to know before planning your Wyoming hunt.

If you're planning to hunt in Wyoming down the road, one of the smartest things you can do right now is build up preference points. These points improve your odds of drawing a tag in the future, especially for high-demand units.
When Can You Purchase Preference Points?
Wyoming allows hunters to buy preference points from July 1 through October 31 each year. This applies to those looking ahead to future hunts—if you didn’t draw this season, this is your window to secure a point for next time.
Nonresidents can buy points for: deer, elk, antelope, moose, and bighorn sheep
Residents can only buy points for: moose and bighorn sheep
❗Note: Wyoming does not offer preference points for bison or mountain goat.
Why It Matters
Since 2019, Wyoming no longer automatically gives you a preference point if you don't draw a tag for deer, elk, or antelope. That means if you want to keep building your points each year, you’ll need to log in and buy them manually during the July–October window.
How Much Do Preference Points Cost?
Here’s a breakdown of current preference point fees in Wyoming:
| Species | Resident | Nonresident | Nonresident Youth |
|---|---|---|---|
| Deer | N/A | $41 | $10 |
| Elk | N/A | $52 | $10 |
| Antelope | N/A | $31 | $10 |
| Moose | $7 | $150 | $150 |
| Bighorn Sheep | $7 | $150 | $150 |
Youth must be at least 11 years old at the time of applying and must turn 12 by December 31 of the year to be eligible.
Understanding Wyoming’s Draw System
Wyoming uses a hybrid draw system:
75% of tags go to applicants with the most preference points (the “regular” draw)
25% of tags are randomly awarded, giving everyone a chance regardless of points
So even if you’re just starting out, you still have a shot at drawing. But stacking up points definitely increases your odds in high-demand areas.
How to Buy Preference Points Online (Step-by-Step)
Here’s how to buy preference points directly from the Wyoming Game and Fish Department (WGFD):
Visit wgfd.wyo.gov.
Click on “Apply or Buy” at the top of the page.
Scroll to “Apply for Licenses” (not "Buy Licenses").
Click “Continue” under the Online Application Service.
Accept the credit card service charge agreement.
Log in or create a WGFD account.
Review and confirm your personal information.
Look for the Preference Points option in your dashboard.
Click “Apply – Pref Points”.
Accept the terms again, then select your residency status.
Choose the species you'd like to buy points for.
Add them to your cart.
Want more? Click “Add Application” and repeat for other species.
Click “Checkout Now” once you’re ready.
You’ll have the option to make a donation (optional).
Optionally, you can also enter Wyoming’s Super Tag raffle.
Enter your credit card info and submit your payment.
Once the transaction is complete, you’ll receive a confirmation email, and your preference points will be updated in your WGFD profile.
Keep Track of Your Points
Once you've purchased your points, it's a good idea to note them somewhere safe—whether that’s your hunting journal, spreadsheet, or whatever you use to track your application history.
Final Thoughts
Building preference points in Wyoming is a long-term strategy that can open doors to some incredible hunting opportunities. Whether you’re after elk in the high country or mule deer on the plains, starting now will pay off in the seasons to come.
If you’ve got questions or tips about the Wyoming draw, feel free to share them in the comments below—I’d love to hear from you.

Leupold Mark 4HD 2.5-10x42 SFP Review: Broken Out of the Box but Handled Quickly
My brand-new Leupold Mark 4HD 2.5-10x42 SFP scope arrived defective—its illuminated reticle didn’t work out of the box. Here’s my honest review of Leupold’s quick customer service, the strange repair process, and why I’m concerned about their quality control.
When it comes to rifle scopes, Leupold is a name that commands respect in the hunting and tactical shooting communities. So when I picked up the Leupold Mark 4HD 2.5-10x42 SFP—a mid-power scope built for precision, durability, and field versatility—I expected top-tier performance right out of the box. Unfortunately, what I got was a brand-new optic that didn’t even function properly.
📦 Broken Out of the Box: A Disappointing Start
Everything looked good when I first opened the box. The glass was clear, the build was solid—but when I went to test the illuminated reticle, nothing happened. I swapped batteries, double-checked the controls, and made sure everything was seated properly. Still no illumination.
Thinking I had overlooked something simple, I reached out to Leupold customer support. The rep was friendly and helpful, and after walking me through additional troubleshooting steps, we confirmed that the electronic reticle system was defective.
🛠️ Great Customer Service—but a Strange Oversight
Leupold emailed me a service request form and instructed me to submit a repair ticket online. I completed it and shipped the scope out the same day. Here's where things got weird—a few days later, I followed up to check the repair status, and Leupold had no record of the ticket in their system.
It was almost like the repair was being handled off the books. I’m not saying they were trying to hide anything, but it's strange that a scope sent in through an official service process wouldn’t be logged into their tracking system. For a company of Leupold’s size and reputation, this kind of internal misstep is concerning—and makes you wonder what’s going on behind the scenes.
That said, once I got in contact with the right person, they assured me the repair had been completed and was on its way back. To Leupold’s credit, they did get the scope repaired and returned to me within a week of receiving it—which is faster than most optics companies in the industry.
😕 Quality Control Concerns
While I appreciated the fast turnaround, I was disappointed that Leupold didn’t send me a brand-new scope to replace the one that was defective straight out of the box. A repair is fine for something that fails after months or years of use, but if a product arrives broken on Day One, that’s a quality control failure, plain and simple.
For a scope in this price range, I expected better. The fact that the repair wasn’t even properly entered into their system only adds to the concern.
🔍 Final Thoughts: Mixed Feelings
✅ Pros: Fast repair turnaround, responsive and polite customer support
❌ Cons: Broken out of the box, repair not logged into system, no full replacement for factory defect
I’m looking forward to testing the Mark 4HD further now that it’s functional, but this experience definitely left a mark. If you're considering this optic, just be aware that while Leupold’s customer service is solid, their quality control—and internal repair tracking—might not be as bulletproof as their reputation suggests.

Kowa TSN-55S vs. Swarovski STC
In this article, I put two of the most compact and high-performance spotting scopes head-to-head: the Kowa TSN-55S and the Swarovski Optik STC. Whether you’re a backcountry hunter, birder, or general outdoor enthusiast, this comparison will help you decide which one is right for your pack. ➡️ I break down the key differences in: Optical clarity and image sharpness Low-light performance Size, weight, and portability Build quality and ergonomics Zoom range and focus system Price-to-performance ratio Both scopes offer incredible performance in a lightweight package, but each has strengths that may better suit your specific needs in the field. 📸 I also include real-world impressions, close-ups, and my honest thoughts after using both in the wild.
[INTRO]
Hey everyone, this is Chris with Ignited by Nature, and welcome back to my channel. Today, I’m putting two ultralight premium spotters head-to-head — the Kowa TSN-55S and the Swarovski Optik STC.
These are compact, high-performance scopes built for the backcountry hunter or serious birder who wants to cut weight without sacrificing clarity. I’ve used both extensively, and in this article, I’ll break down the key differences to help you decide which one deserves a spot in your pack.
[SECTION 1: QUICK STATS + OVERVIEW]
Let’s kick things off with some quick specs:
Kowa TSN-55S
55mm pure fluorite crystal objective (grown in-house)
17mm eye relief
Exit pupil: 3.2–1.4mm
17–40x magnification with the TE-11WZ II eyepiece
Field of view: 192–105 ft at 1,000 yards
Close focus: 9.2 ft
Advertised length: 10.6 in
Actual length: 10 13/16 in (10.8 in)
Advertised weight: 33.8 oz
Weight without lens covers: 34.14 oz (2 lbs 2.1 oz)
Weight with lens covers: 34.96 oz (2 lbs 3 oz)
Light transmission: Unknown
Swarovski STC
56mm HD glass objective (not made in-house)
20mm eye relief
Exit pupil: 3.4–1.4mm
Fixed 17–40x magnification
Field of view: 186–102 ft at 1,000 yards
Close focus: 11.2 ft
Advertised length: 11.2 in
Actual length: 11 2/16 in (11.13 in)
Advertised weight: 34.6 oz
Weight without lens covers: 34.64 oz (2 lbs 2.6 oz)
Weight with lens covers: 35.66 oz (2 lbs 3.7 oz)
Light transmission: 88%
In the end, both are small, streamlined, and pack serious glass for their size — but they differ in ergonomics, field usability, and overall feel.
[SECTION 2: OPTICAL PERFORMANCE]
Let’s start with the glass — both are razor-sharp, but they achieve that in different ways.
The Kowa uses a pure fluorite crystal objective, which is about as high-end as it gets. The glass is grown directly in their Japanese labs. It delivers exceptional sharpness, accurate color, and reduces chromatic aberration extremely well — especially in harsh light. Overall, the field of view is wider, and the edges appear slightly clearer.
Meanwhile, the Swarovski STC uses high-definition (HD) glass paired with their legendary coatings, which creates an image that’s bright, crisp, and has that signature Swarovski "pop" in color and contrast. The glass isn’t grown in-house but is refined by Swarovski.
To my eye, the Kowa has a slight edge in true color accuracy, field of view, and edge clarity — but I prefer the slightly warmer pop of the Swarovski STC. It has a warmer tone and handles glare beautifully.
Bottom line: Both are stunning. You’d be hard-pressed to name a definitive winner without splitting hairs.
[SECTION 3: FIELD USE & ERGONOMICS]
This is where personal preference really comes into play.
The STC is built for speed and simplicity. It’s heavier by about half an ounce (without lens covers), and it now includes an attachable tripod foot and a half-shell support for hand-holding — super handy for quick glassing or minimalist setups. It supports both ¼- and 3/8-inch tripod adapters. The STC has a barrel-style focus, full rubber armor for protection, and a slimmer form factor that fits more easily into a pack.
The Kowa TSN-55S, on the other hand, features a dual-focus knob — which I absolutely love for fine-tuning at higher magnification. It includes a peep sight for quicker target acquisition and a built-in retractable sunshade — a nice touch. The 55S is slightly lighter but has a bulkier form factor. Its magnesium housing lacks full rubber armor, although the eyepiece is rubberized, which is great in hot or cold conditions. The tripod foot doesn't include an Arca plate by default, but it's more usable and has a larger base for mounting aftermarket plates.
[SECTION 4: MAGNIFICATION & IMAGE STABILITY]
Both scopes feature a 17–40x zoom range, which hits the sweet spot for backcountry spotting — enough reach to verify game, without sacrificing clarity or brightness.
Zooming in to 40x, both scopes maintain detail extremely well. I didn’t notice any major drop-off in sharpness, though the dual focus on the Kowa makes it easier to fine-tune and squeeze out that last bit of clarity at max power.
That said, the Swarovski felt more comfortable to look through at high magnification and seemed to produce a slightly sharper image past 35x.
At the lower end, 17x still gives you a usable field of view, though it’s a bit more tunnel-visioned than a 15x would be. For their size, both scopes deliver impressively balanced optics across the zoom range.
If you wear glasses, I found that the Kowa allows you to get closer to the eyepiece, offering a slightly better field of view.
And in the lowest light, the Swaro pulls slightly ahead in brightness — likely due to its slightly larger 56mm objective lens.
[SECTION 5: PRICE & VALUE]
Let’s talk numbers and resale:
Kowa TSN-55S: $2,000–$2,499
Swarovski STC: $2,400–$2,699
The Kowa gives you true fluorite glass, precision dual focus, and a slightly better field of view — at a lower price.
The STC offers a sleek, all-in-one design, better durability, and that iconic Swarovski image quality.
Resale value? Hands down, Swarovski holds its value better — thanks to brand reputation and consistency. I also appreciate that when Swarovski releases new products, they don't immediately discontinue older ones.
Kowa, unfortunately, did just that — and I personally lost a lot on the 554 model. It dropped from $1,999 to $1,299 just before the 55S was released, and I only managed to sell it for $800. That stung.
[SECTION 6: PROS & CONS – HEAD TO HEAD]
Kowa TSN-55S – Pros
Fluorite crystal glass
Dual focus knobs for micro-adjustments
Excellent field of view and edge clarity
Built-in sunshade and peep sight
½ oz lighter than the Swaro
Better Close focus at 9.2ft
Kowa – Cons
No rubber armor on body
Arca plate not included
Smaller 55mm objective lens
Bulkier, less sleek design
Lower resale value
Swarovski STC – Pros
Slender, streamlined design
Full rubber armor
New Arca-compatible tripod adapter
Excellent clarity and contrast
Slightly sharper image from 35–40x
Larger 56mm objective lens
Better resale value
STC – Cons
½ oz heavier
Lacks dual focus
Slightly narrower field of view
More expensive
Close focus distance of 11.2 ft
[SECTION 7: FINAL THOUGHTS]
So — which one should you go with?
If you want top-tier glass, better edge clarity, a slightly lighter package, and a slightly lower price — the Kowa TSN-55S is a phenomenal value. The fluorite crystal truly shines in imperfect conditions and offers a cooler, more neutral image.
But if you prioritize rugged protection, a brighter image with punchy color, and a more compact, user-friendly form — the Swarovski STC is a fantastic choice. It’s perfect for ultralight trips or fast-paced hunts where speed and simplicity are king.
[OUTRO]
Thanks for watching and remember to stay connected to the wild! If you found this article helpful, then subscribe to my mailing list for more outdoor gear reviews and adventures.
Drop a comment below: Would you go Kowa or Swarovski? I’d love to hear what you’re running in the field.
Once again, I’m Chris with Ignited by Nature. Until next time, guys and gals!

The Gear I Bring – And the Exact Order I Pack It
Ever wondered if you can pack everything you need for a 3-day backpacking or hunting trip into just a day pack? In this article, I’ll show you exactly how I do it with my Exo Mointaon Gear 2200 pack system—what I bring, what I leave behind, and how I organize it all to stay light, efficient, and ready for the backcountry. Whether you're trying to go ultralight, planning a quick weekend hunt, or just want to maximize your gear without hauling a bulky pack, this video breaks down the essentials you need—and nothing you don’t. 🪵 Topics Covered: Essential gear for 3-day trips Packing strategy & tips Lightweight layering system Food & water solutions Space-saving gear recommendations 🎒 Pack smart. Go light. Stay out longer.
Main Compartment
Therm-a-Rest Vesper 20 Quilt
My first item into the pack is my ultralight sleeping bag: the Vesper 20-degree quilt from Therm-a-Rest. With 900-fill down and weighing just 1.3 lbs, it offers excellent warmth-to-weight performance.Sleep System: Shelter & Pad
Hyperlite Flat Tarp paired with a splash bivy for ultralight shelter.
Therm-a-Rest NeoAir XLite sleeping pad for comfort and insulation.
Med Kit
My first aid kit is a modified Adventure Medical Kit from Cabela’s. I’ve customized it by removing excess items and adding supplies I trust in the field.Food Packs
Two 1-gallon Ziploc bags filled with food, each weighing roughly 2 pounds. These hold two days of backcountry fuel, including freeze-dried meals, trail mix, and calorie-dense bars.Pillow
The Sea to Summit Aeros Premium Pillow adds a surprising amount of comfort without much weight or bulk.Cook System
Toaks Titanium 750ml Pot
My stove and pot go near the top of the main compartment for quick access when I get to camp or want hot food on a break.
Puffy Jacket
My First Lite Brooks Down Puffy is also packed at the top of the main compartment for fast access if temps drop suddenly.
Once everything is in, I zip up the main compartment.
Exterior Storage & Side Pockets
48 oz Nalgene goes in the dedicated Exo K4 Nalgene holder on the hipbelt.
Hipbelt Pockets:
One side holds quick snacks.
The other houses my Ivory Holsters pistol holster, fitted for my Sig P365X Macro.
Side Zip Pocket:
I store my Swarovski STC spotting scope here—it fits securely and stays protected.Side Stretch Pockets:
One holds my Black Diamond Distance Carbon FLZ trekking poles and Therm-a-Rest Z Seat.
The other carries my Peak Design Carbon Fiber Tripod with the RRS PT Scout Pan Head.
Lid Storage (Blaze Orange Add-On)
I use the optional blaze orange lid from Exo (sold separately), which adds valuable top storage space. My Swarovski 14x52 NL Pure binoculars are secured under the lid when I bring them as a second set of glass.
Large Zippered Lid Pocket:
Battery pack
Paracord
Phone Skope adapter
HydraPak Seeker 3L water filtration system
Extra headlamp battery
Ultralight pistol holster for sleeping in bivy
Small Zippered Lid Pocket:
Fenix HM62-T lightweight headlamp
Additional Gear
Digital Thermometer: I keep an AcuRite digital thermometer clipped to the outside of my pack to monitor real-time ambient temperatures.
Rain Gear: If rain is in the forecast, I pack my Outdoor Research Helium rain jacket and pants. If not, they usually stay in the truck.
Bino Harness Setup
I run a Marsupial Gear bino harness, which allows me to keep critical tools on my chest:
This setup lets me access optics, tags, snacks, and emergency tools without digging into my pack.
The Philosophy: Minimalist, Not Miserable
My strategy is simple: bring only what I need—and nothing more. That means trimming down redundancies, packing ultralight, and selecting high-quality, multi-use gear. Even with optics, food, and shelter, my setup remains nimble, fast, and adaptable for 3-day adventures in the mountains.
This packing method allows me to stay efficient, comfortable, and fully capable of handling the backcountry while relying solely on a “day pack.” It's not about roughing it—it's about packing with intention.
Watch the Full Breakdown
🎥 Click here to watch the full video breakdown on YouTube
Gear Up with Ignited by Nature
Looking for the exact gear I use? Visit the Ignited by Nature store to find outdoor-tested essentials, curated kits, and gear that keeps you connected to the wild.
Thanks for reading, and remember to stay connected to the wild!
If you found this helpful, hit that like button on YouTube, subscribe to the channel, and leave a comment sharing your favorite backcountry packing tip in the comment section below..
— Chris, Ignited by Nature

Maven B.3 6x30mm Binoculars Review: Compact Clarity That Surprised Me
Hey there guys and gals, this is Chris with Ignited by Nature and welcome back to the channel! In this article, I take a hands-on look at the Maven B.3 Compact Binoculars—a powerhouse in a pocket-sized package. Whether you're a backcountry hunter, birdwatcher, or just need a reliable set of binoculars that won’t weigh you down, the B.3 might just be what you're looking for. I’ll cover: 🔎 Key specs and features 🧤 Real-world performance in the field 💡 Pros and cons after extended use 🆚 How the B.3 compares to full-size binoculars 🌲 Whether it earns a spot in your kit The B.3 is known for its sharp image clarity, durable build, and surprisingly bright optics for its compact size. But is it worth the price? Watch to find out!
When it comes to optics, compact often means compromise — but not this time. The Maven B.3 6x30mm binoculars caught me off guard with its performance, clarity, and utility in a featherweight package.
After weeks of real-world use — from scouting hikes and shed hunts to quick turkey glassing sessions — I’ve come away impressed. These binos aren’t just a niche tool; they’re a genuinely useful addition to any outdoor kit. Let’s dive into the specs, performance, pros and cons, and who I think these binos are best suited for.
Quick Specs & First Impressions
Right out of the box, the Maven B.3 feels like the perfect blend of a high-end pocket binocular and a mid-sized performer. Lightweight, sleek, and ready for action.
Core Specifications:
Magnification: 6x
Objective Lens: 30mm
Field of View: 446 ft @ 1,000 yards
Angular FOV: 8.5°
Apparent FOV: 51°
Exit Pupil: 5mm
Eye Relief: 18.3mm
Interpupillary Distance: 56–73mm
Weight: 16.08 oz (without covers)
Dimensions: 4.7 x 4.6 x 1.6 inches
Prism Type: Schmidt-Pechan
Glass Type: ED Glass (Extra-low Dispersion)
Body: Lightweight polymer
Waterproof/Fogproof: Yes (IPX7)
Lens Coating: Fully multi-coated
Origin: Designed in Wyoming, assembled in San Diego, with components sourced from Japan
Price: $525 for 6x, $550 for 8x, $575 for 10x
As with all Maven optics, they’re customizable in color and finish when ordered directly — a nice touch for those who want a personal flair.
Optical Performance
Let’s be honest: compact binoculars aren’t usually known for top-tier glass. But the B.3 does exceptionally well in this department.
Thanks to the ED glass and fully multi-coated lenses, these binos produce a sharp, contrast-rich image that holds its clarity impressively well — although it somewhat struggles towards the edges. Colors appear neutral and natural, without the color shift you sometimes get from budget-friendly optics.
While Maven didn’t use fluorite crystal glass in the B.3s (a material reserved for their premium lines), the ED glass still delivers excellent optical performance for the price. And with 6x magnification, image stability is a huge win — there’s virtually no noticeable handshake.
Field Use: Where They Shine
Over the last few months, I’ve used the Maven B.3s on everything from shed hunting and turkey scouting to casual glassing hikes. These are perfect when you want optics that disappear into your pack or jacket pocket.
Their standout feature is the wide field of view — 446 feet at 1,000 yards — which is incredible for scanning timber, brush, or tight terrain. Pair that with a generous 5mm exit pupil, and you’ve got solid low-light usability too.
Honestly, these binos saved me countless miles while searching for sheds. They’re fast, easy to use, and ideal for quick glassing without the bulk.
Build Quality & Ergonomics
Maven’s reputation for rugged construction holds up here. Despite using a polymer body instead of magnesium, the B.3 still feels like a true member of the B Series lineup — tough, reliable, and well-balanced.
Highlights include:
Rubber armor and IPX7 waterproofing
Shock-resistant and fogproof design
Twist-up eyecups with smooth, secure detents
Smooth, responsive focus wheel (easily one-hand operable)
Tripod adaptable — rare for binos this compact
The diopter adjustment is tight and stays in place, and at 18.3mm of eye relief, these work well even for glasses wearers.
What I Love vs. What I Don’t
👍 What I Love:
Ultra-lightweight and extremely compact
Super wide-angle viewing with excellent clarity
Stable, low-magnification image perfect for handheld use
Reliable construction and weatherproofing
Great color fidelity and contrast
Tripod adaptable — an added bonus at this size
👎 What I Don’t:
6x may feel limiting to those used to 10x glass
Not designed for long-range, detailed viewing
No fluorite crystal glass (ED only)
Polymer body (though still solid)
Modest resale value compared to Maven’s flagship models
Who These Binoculars Are For
If you’re a backcountry hunter, birder, whitetail or blacktail hunter, or just someone who wants a compact bino to stash in the truck or daypack, the Maven B.3s are a great fit.
They’re also excellent for:
New shooters or youth hunters
Anyone who struggles with shaky hands using higher magnification
Folks looking for a backup set of optics that won’t weigh them down
Final Verdict
The Maven B.3 6x30s are not here to replace your 10x42s or 15x56s. But they fill a critical niche — delivering top-tier clarity, rock-solid stability, and true grab-and-go convenience.
They’re optics that disappear until you need them, and when you do, they’re ready to perform. Add in Maven’s no-fault lifetime warranty, and you’ve got a serious contender in the compact bino space.
At $525, they’re not “budget,” but they deliver well beyond their size and price tag.
Stay connected to the wild. If you found this article helpful, consider subscribing to the channel or newsletter for more honest gear reviews and backcountry insights. Have you tried the B.3s or another favorite compact binocular? Let me know in the comments!
Until next time — take care and get outside.
— Chris
Ignited by Nature

Apple Watch vs. Garmin Watch: Which is Right for You?
Hey there guys and gals, this is Chris with Ignited by Nature, and in today’s article, I’m taking a high-level look at two of the biggest names in the smartwatch world—Apple Watch and Garmin. Whether you're into fitness tracking, health monitoring, outdoor adventures, or smart features, both brands bring something unique to the table. But which one fits your lifestyle better? I break down the key differences in ecosystem, fitness features, battery life, durability, and more to help you make the right choice—without diving into specific models. This is all about understanding the strengths of each brand at a broad level. Let me know in the comments which smartwatch brand you’re rocking—and why!
Whether you're a fitness fanatic, an outdoor adventurer, or someone who just wants a reliable smartwatch, you’ve probably asked yourself: Apple Watch or Garmin Watch—what’s the better choice? In this high-level comparison, we’re breaking down everything you need to know to make the right decision based on your lifestyle.
Let’s dive into it.
Design & Build Quality
Apple Watch:
If you're drawn to sleek, modern, and minimalist design, the Apple Watch has you covered. Available in materials like aluminum, stainless steel, and titanium, it fits seamlessly into your everyday life—whether you’re in the boardroom, at the gym, or out for dinner.
Garmin Watch:
Garmin takes a different route. Their watches, especially models like the Fenix series, lean into a rugged, tactical aesthetic. Designed for durability, they often include reinforced cases, scratch-resistant glass, and high water resistance. They’re bulkier but purpose-built for rough conditions and active lifestyles.
Verdict:
Go with Apple for style and everyday wear. Choose Garmin if you want a watch that can withstand your wildest adventures.
Features & Smart Functionality
Apple Watch:
The Apple Watch is a smart device first, fitness device second. It offers deep integration with iPhones, access to the App Store, calls, texts, Apple Pay, and advanced health tools like ECG and blood oxygen monitoring. It’s basically an extension of your iPhone on your wrist.
Garmin Watch:
Garmin leans more into health and fitness. You’ll still get notifications and music controls, but Garmin stands out with features like VO2 max, heart rate zones, training status, recovery time, and GPS navigation—even solar charging on some models. If your weekends are spent hiking, trail running, or backcountry skiing, Garmin’s features are built for you.
Verdict:
Apple leads in smart features and seamless connectivity. Garmin wins in fitness tracking and outdoor readiness.
Fitness Tracking & Health Monitoring
Apple Watch:
Ideal for general fitness tracking. It monitors heart rate, sleep, blood oxygen levels, and keeps you motivated with its iconic activity rings. Great for users looking to stay healthy and active throughout the day.
Garmin Watch:
Garmin goes deeper. Whether you’re a runner, cyclist, or mountaineer, Garmin provides more detailed metrics—like GPS accuracy, VO2 max, recovery time, and even advanced sleep tracking. Battery life in GPS mode is vastly superior to Apple’s.
Verdict:
Apple is great for casual users. Garmin is built for serious athletes and outdoor explorers.
Battery Life
This is a big one—and for me, personally, a dealbreaker.
Apple Watch:
Typically lasts 18–24 hours per charge. It supports fast charging, but many users end up charging it every night or even mid-day if they’re active.
Garmin Watch:
Garmin dominates this category. Depending on the model, you can get anywhere from several days to several weeks on a single charge—even with GPS tracking enabled. Models like the Garmin Fenix even include solar charging for added longevity during extended trips.
Verdict:
Garmin is the clear winner for battery life. Apple Watch users should get used to daily charging.
Ease of Use & App Ecosystem
Apple Watch:
Apple’s interface is clean, polished, and user-friendly. If you’re already part of the Apple ecosystem, it’ll feel instantly familiar and intuitive.
Garmin Watch:
Garmin’s UI is more utilitarian, but once you get used to it, it’s very efficient—especially for outdoor navigation and workouts. Garmin’s app ecosystem is more niche, but extremely useful for those who spend time in the backcountry or on the trails, with apps for topo maps, ski routes, and weather tracking.
Verdict:
Apple’s app experience is broader. Garmin’s is more specialized for adventurers and athletes.
Price & Value
Apple Watch:
Pricing starts around $250 for the SE model and goes up to $799+ for the high-end versions with all the health sensors and cellular connectivity.
Garmin Watch:
Garmin offers a wide range—from under $200 for entry-level models to over $1,000 for premium models like the Fenix 7 or Epix Pro. You're paying more for outdoor capabilities, premium materials, and better battery.
Verdict:
Apple offers strong value for smart features. Garmin’s higher price tags are justified if you need serious tracking, durability, and battery life.
Final Thoughts: Which One Should You Choose?
It really comes down to your lifestyle and priorities.
Choose Apple Watch if you want a sleek smartwatch that integrates perfectly with your iPhone and delivers a full suite of smart features, stylish design, and health tracking for everyday life.
Choose Garmin if you’re an athlete, outdoorsman, or someone who values advanced fitness tracking, durability, and industry-leading battery life. For me personally, Garmin wins for its outdoor-focused design, rugged build, and unbeatable endurance.
Thanks for reading, and remember to stay connected to the wild! If you found this article helpful, feel free to share it, and follow me for more outdoor gear reviews and adventures. Got a favorite between Apple and Garmin? Drop a comment below and let me know which one you use—and why.
Once again, I’m Chris with Ignited by Nature. Until next time, guys and gals!

NightForce SHV vs NXS: Which Scope Is Right for You?
🔍 In this article, I compare the NightForce SHV 3-10x42mm scope with the NXS 2.5-10x42mm scope. 🔍 Whether you're a hunter, competitive shooter, or just a fan of quality optics, NightForce offers some of the best rifle scopes on the market. But with so many options, which one is best suited for your needs? In this 8-minute video, I break down the key differences and similarities between the NightForce SHV and NXS scopes. I cover everything from glass quality, turrets, reticles, and weight, to price and parallax adjustment. You'll also learn which scope is better for hunting, and which one is perfect for tactical or precision shooting. 🔔 Make sure to watch until the end for my final thoughts on which scope offers the best value for your needs!
NightForce SHV vs NXS: Which Scope Is Right for You?
When it comes to high-performance rifle scopes, NightForce is one of the first names I trust. Two of their most talked-about models—the NightForce SHV 3-10x42mm and the NightForce NXS 2.5-10x42mm—are often compared, and for good reason. While both offer excellent optics and durability, they serve different types of shooters. In this article, I’ll walk you through the key similarities and differences to help you decide which scope fits your style best.
SHV vs NXS: What the Names Mean
Let’s start with what the names actually stand for:
SHV stands for Shooter, Hunter, Varminter. It’s built for recreational shooters and hunters who want a tough, reliable scope without all the tactical bells and whistles.
NXS stands for Next Generation Scope. It was originally designed for military and competition use, and it shows in the advanced features and performance.
Both scopes have earned a solid reputation, and they’ve each been around long enough to prove themselves in the field.
What the SHV and NXS Have in Common
Even though they target different users, both scopes share several important qualities:
Glass Quality: I couldn’t see any noticeable difference in clarity or sharpness between the two. Both offer excellent optical performance with sharp, clean images.
Magnification and Size: They each max out at 10x magnification, have 42mm objective lenses, and are built on 30mm main tubes.
Durability: These are NightForce scopes—built to take a beating and keep performing.
The Differences That Matter
Now here’s where things start to separate the SHV from the NXS.
1. Price
SHV: Around $985
NXS: About $1,760
If you’re on a budget, the SHV offers outstanding value without compromising on core performance.
2. Turret Design
SHV: Capped turrets, which are great for hunters who don’t dial often.
Adjustments: ¼ MOA increments
Max Elevation: 90 MOA
Max Windage: 80 MOA
NXS: Exposed turrets with a zero-locking elevation turret—perfect for precision shooters who need to dial quickly and confidently.
Available in both MOA and Mil-Rad options
Elevation: 100 MOA or 29 Mils
Windage: Same range as elevation
I find the NXS turrets much better suited for long-range or tactical use.
3. Reticle Options
SHV: Comes with the MOAR 30 MOA reticle or the more traditional ForcePlex.
NXS: Offers either the MOAR or Mil-R reticle.
The NXS gives you a bit more flexibility depending on whether you shoot MOA or Mils.
4. Size and Weight
NXS: Weighs 22.42 oz and measures 11.9 inches
SHV: Weighs 22.19 oz and is 11.6 inches long
The SHV is a touch shorter, while the NXS is just slightly lighter. These differences are minimal, but worth noting if you’re counting every ounce.
5. Field of View and Magnification Range
NXS: Starts at 2.5x and has a slightly wider field of view (3.3 inches), which helps for closer shots. It also features a low-profile throw lever for easier magnification changes.
SHV: Starts at 3x and has a slightly narrower field of view (3.2 inches) without the throw lever.
For me, the throw lever on the NXS makes transitions a little quicker and smoother in the field.
6. Focusing and Parallax
NXS: Offers a smooth parallax adjustment down to 25 yards, and the whole eyepiece turns for focus.
SHV: Newer illuminated models have fixed parallax at 136.7 yards (125 meters). The focus wheel is separate and located at the front. Instead of a parallax adjustment knob, the SHV has an illumination control.
If you shoot at varying distances, the adjustable parallax on the NXS is a major advantage.
My Take: Which Scope Should You Pick?
Here’s how I break it down:
Get the SHV if you’re a hunter or general-purpose shooter who wants a reliable, high-quality scope at a more affordable price.
Go for the NXS if you need more precision, adjustability, and tactical features. The exposed turrets, parallax adjustment, and mil/MOA options make it ideal for long-range or competitive shooting.
Both are outstanding scopes—but they shine in different areas.
Final Thoughts
If you're looking to upgrade your rifle with a NightForce optic, you can’t go wrong with either one. Just be honest with yourself about how you shoot and what features you’ll actually use. That’s what will ultimately help you make the right call.
Thanks for reading, and remember to stay connected to the wild! If you found this helpful, feel free to share it or leave a comment letting me know which scope you're using. You can also follow me on social media for more outdoor gear reviews and adventures. Once again, I’m Chris with Ignited by Nature—until next time, guys and gals!

NightForce SHV 3-10x42mm Rifle Scope Review
In this article, I dive into the NightForce SHV 3-10x42 rifle scope, breaking down its performance, features, and whether it's the best mid-range scope for serious shooters. From hunting to target shooting, this scope promises precision and durability, but how does it really stack up? Let's find out! If you found this review helpful, don't forget to hit the like button and subscribe for more outdoor gear reviews and adventures. Stay connected to the wild!
Whether you're a dedicated hunter, a mid-range precision shooter, or someone just looking for a rugged and versatile optic, the NightForce SHV 3-10x42mm might be exactly what you need. In this review, I’m breaking down everything you need to know—from build quality and optical performance to reticle options and field usability.
Let’s dive in.
Scope Overview
The NightForce SHV (Shooter, Hunter, Varminter) 3-10x42mm is a do-it-all scope built for real-world shooting scenarios. It hits that sweet spot of versatility—perfect for everything from timberline elk hunts to punching paper at 600 yards.
With a magnification range of 3x to 10x, it's great for close encounters as well as moderate-range shots. The scope features:
¼ MOA turret adjustments
30mm main tube
3.5 inches of eye relief
Fixed parallax at 125 meters (on illuminated models)
There are three illumination configurations: non-illuminated, fully illuminated, and center-only illumination. My version is center-illuminated, which I’ve found particularly helpful in low-light timber situations. One important distinction—non-illuminated models come with side parallax adjustment, while the illuminated versions do not.
When it comes to reticles, you get to choose between the MOAR and Forceplex options—both in the second focal plane, meaning reticle size remains constant through magnification. Just remember: your holdovers are only accurate at the max 10x setting.
Build Quality & Design
If there's one thing NightForce is known for, it’s rugged construction—and the SHV delivers. Built from aircraft-grade aluminum, this optic is designed to take a beating and keep performing. Whether you’re out in the rain, snow, or tracking through thick brush, it’s waterproof, fogproof, and shockproof.
Specs-wise:
Weight: 22.19 oz (NightForce lists it at 22.2 oz—nice to see they’re spot-on)
Mounting length: 5.1 inches
Overall length: 11.6 inches
While it’s slightly heavier than some other optics in its class, it’s compact and still light enough to carry on a backcountry hunt.
Optical Performance
NightForce optics have a reputation for sharpness and brightness, and this scope lives up to that legacy. The fully multi-coated lenses do a great job transmitting light, which pays dividends during dawn and dusk—the times hunters know matter most.
Edge-to-edge clarity is excellent, and
Color and contrast are solid across the board.
At full 10x magnification, I did notice a minor drop in clarity at the outer edges in very low light, but for a scope at this price point, the performance is seriously impressive.
Adjustments & Turrets
The SHV's windage and elevation turrets offer precise, positive clicks that are easy to feel—even with gloves on. You get:
90 MOA of elevation adjustment
80 MOA of windage adjustment
The turrets are capped, meaning no exposed turrets or zero stop here. While this might be a con for some precision shooters, it also means fewer things to snag or accidentally bump in the field. For hunters who prefer a “set-it-and-forget-it” style optic, this is a plus.
Reticle Options & Field Use
I opted for the MOAR reticle, and it’s been a great fit for both hunting and informal long-range work. With fine lines and additional holdover marks, it offers excellent precision without feeling cluttered.
One of the features I really appreciate is the illuminated center crosshair. It helps tremendously in low-light timber scenarios—perfect for calling coyotes or glassing whitetails in dense cover.
At 3x magnification, the reticle remains simple and fast to acquire targets. Crank it up to 10x, and it becomes a powerful tool for longer shots, especially when you don’t want to fiddle with turrets mid-hunt.
This reticle design makes the SHV a perfect fit for:
Eastern whitetail hunters
Pacific Northwest timber hunters
Idaho or Montana backcountry shooters
Price & Value
The NightForce SHV 3-10x42mm typically retails between $900 and $1,000, depending on the model and retailer.
Is it budget-friendly? Not exactly.
Is it worth it? Absolutely—especially when you consider NightForce’s reputation for build quality, consistency, and long-term reliability.
For the price, you’re getting a scope that can handle nearly any scenario and is built to last season after season.
Pros & Cons
Pros:
Top-notch build quality with durable construction
Excellent optical clarity—even in low light
Smooth, tactile turrets that feel premium
Versatile magnification range
MOAR reticle is ideal for hunters who prefer holdovers over dialing
Cons:
Slight edge clarity drop at 10x in low light
Heavier than some competing scopes in its class
No zero stop or exposed elevation turret—capped design may not suit all shooters
Final Thoughts
To sum it up, the NightForce SHV 3-10x42mm is a rock-solid, field-ready scope for the hunter or shooter who needs versatility, durability, and dependable performance. It may not have all the bells and whistles of higher-end tactical scopes, but it doesn’t need to. What it offers is a refined, reliable optic that’s ready to go whenever you are.
Thanks for reading, and remember to stay connected to the wild!
If you found this review helpful, consider subscribing to Ignited by Nature on YouTube for more outdoor gear reviews and adventures. Drop a comment below and let me know what scope you're running, or if you've had any hands-on experience with the SHV.
Until next time—stay wild out there.
– Chris

Kowa TSN-554 vs. TSN-55S: Which Spotting Scope Is Right for You?
Kowa TSN 55S vs TSN 554: Is the Newer Model Really Better?In this video, I dive into a head-to-head comparison between the brand new Kowa TSN 55S and the older, but trusted, Kowa TSN 554 spotting scopes. 🎯Are the upgrades in the TSN 55S worth the investment, or should you stick with the classic TSN 554? I break down the differences, strengths, and weaknesses of both models to help you decide which one is right for your outdoor adventures. Whether you're a birder, hunter, or just love quality optics, this video will help you make an informed decision.🔍 Key areas of comparison:Optical performance and clarityWeight, size, and portabilityNew features in the TSN 55S vs the TSN 554Build quality and durabilityPrice vs performanceWatch until the end for my final verdict on whether the TSN 55S is really an improvement over the TSN 554 and if it's worth upgrading to the latest model!👉 Have you used either of these spotting scopes? Let me know your thoughts in the comments below, and don't forget to like, share, and subscribe for more outdoor gear reviews and comparisons!Thanks for watching, and stay connected to the wild! 🌲
If you’re in the market for a high-performance spotting scope, chances are you’ve come across Kowa’s popular models: the TSN-554 and the newer TSN-55S. Both offer exceptional optics, but which one is the best fit for your outdoor adventures? In this blog post, we’ll compare these two models to help you decide which is worth your investment.
Kowa TSN-554: Compact and Versatile
The Kowa TSN-554 is a compact, lightweight spotting scope that doesn’t compromise on optical performance. Equipped with Kowa’s PROMINAR fluorite crystal lens, the TSN-554 provides sharp, clear images with incredible color accuracy, making it ideal for birdwatching, wildlife observation, or long-distance shooting.
Key Features:
Magnification Range: 15-45x
Field of View: 144 ft at 1000 yards (at 15x), 75 ft at 1000 yards (at 45x)
Weight: 28.2 oz
Close Focusing Distance: 9.8 ft
The TSN-554’s compact design makes it easy to carry, while its magnification range is versatile enough to handle various types of outdoor activities. However, at higher magnifications, the field of view is somewhat narrow, which might make it harder to spot fast-moving wildlife or objects.
Kowa TSN-55S: The Premium Upgrade
The Kowa TSN-55S is the latest addition to Kowa’s 55mm line of spotting scopes. It builds on the success of the TSN-554 but takes optics and ergonomics to the next level. If you're seeking an upgrade that offers enhanced image quality and a wider field of view, the TSN-55S might just be what you're looking for.
Key Features:
Magnification Range: 17-40x
Field of View: 210 ft at 1000 yards (at 17x), 115 ft at 1000 yards (at 40x)
Weight: 34 oz
Close Focusing Distance: 9.2 ft
The TSN-55S has a wider field of view, which makes it easier to scan large areas or track fast-moving wildlife. It also boasts an improved TE-11WZ wide-angle eyepiece, which enhances both image quality and comfort during extended viewing sessions. The eyepiece features ED (extra-low dispersion) lenses for better light transmission and higher resolution, resulting in crisper, more vivid images.
Optical Performance: Which Scope Delivers the Sharpest Image?
Both the TSN-554 and the TSN-55S feature Kowa’s PROMINAR fluorite crystal lens, renowned for reducing chromatic aberration and producing stunning image clarity. However, there are some differences in how these scopes perform.
TSN-554: With its higher magnification range, the TSN-554 provides great detail at longer distances. However, the field of view is narrower, which might make it a bit more challenging to find your target at higher magnifications.
TSN-55S: The TSN-55S stands out with its wider field of view, offering an easier and faster way to scan large areas. It provides better edge-to-edge clarity and a more forgiving eye box, making it ideal for extended use. Its improved optics make it a superior choice if you prioritize excellent image quality across various conditions.
Design and Durability: Built for the Outdoors
When it comes to durability, both scopes are built to withstand the elements. Both the TSN-554 and TSN-55S are waterproof and fogproof, ensuring that they perform well in harsh weather conditions. Whether you’re out in the rain or in freezing temperatures, these scopes will keep you focused on your subject.
TSN-554: The TSN-554’s lightweight design makes it easy to take on the go, weighing just 28.2 oz. Its compact size allows it to fit easily into your pack or case.
TSN-55S: The TSN-55S is slightly heavier at 34 oz, but it offers a more ergonomic design with better handling. Its improved mounting footprint adds extra stability, reducing unwanted movement when attached to a tripod.
Which One Is Right for You?
So, how do you decide between these two excellent spotting scopes?
Go for the Kowa TSN-554 if:
You need a lightweight and portable spotting scope.
You want a more affordable option without sacrificing optical quality.
You don’t mind a narrower field of view at higher magnifications.
Go for the Kowa TSN-55S if:
You want the best image quality with edge-to-edge clarity.
You need a wider field of view for scanning large areas or tracking fast-moving subjects.
You’re looking for a premium upgrade that’s designed for comfort and ease of use during long viewing sessions.
Final Thoughts:
Both the Kowa TSN-554 and the TSN-55S offer incredible performance, but they cater to slightly different needs. If portability and budget are your priorities, the TSN-554 is a fantastic choice. But if you’re looking for a premium experience with superior image clarity and a wider field of view, the TSN-55S delivers just that.
Thanks for reading, and if you have any questions or thoughts about these scopes, feel free to leave a comment below. Happy spotting!
Closing:
"Thanks for reading and remember to stay connected to the wild! If you found this blog post helpful, hit that like button and subscribe to my blog for more outdoor gear reviews and adventures. You can also follow me on social media if you haven’t already. Once again, I’m Chris with Ignited by Nature. Until next time!"
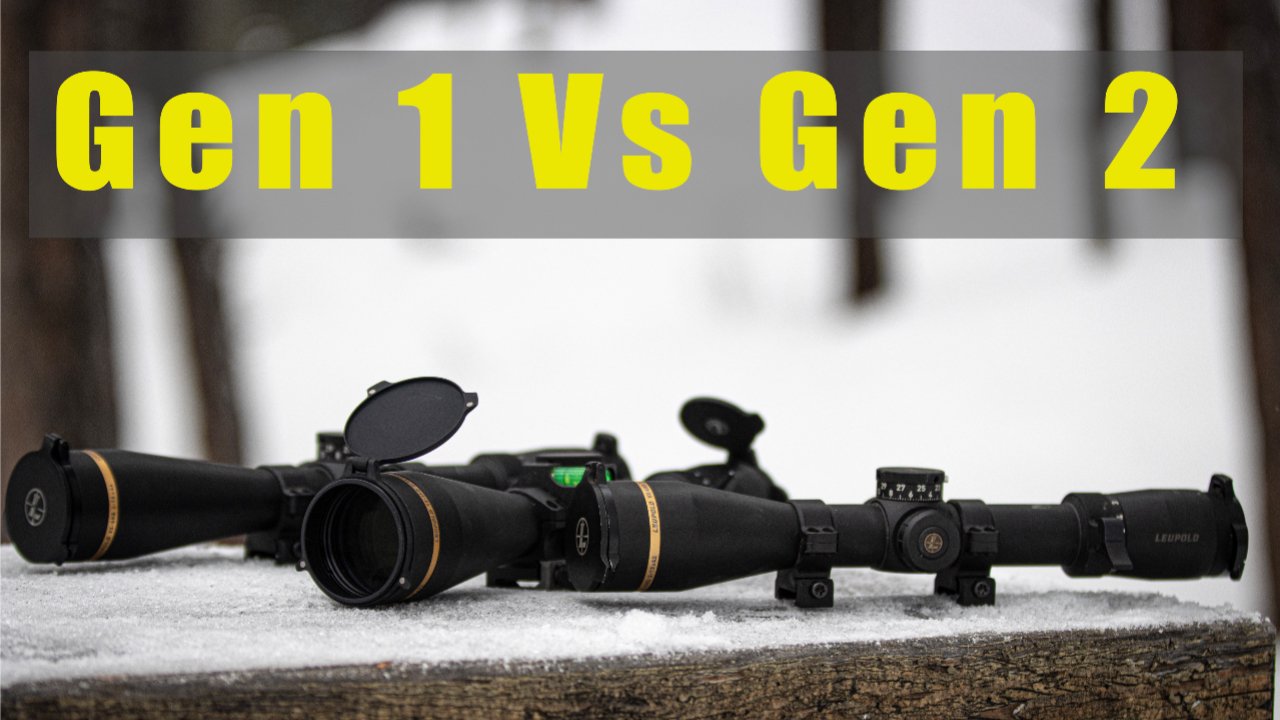
Leupold VX-6HD Gen 1 vs Gen 2: What’s New and Is It Worth Upgrading?
f you're in the market for a high-end rifle scope or already own a Leupold VX-6HD, you've probably heard about the new Gen 2 update. While it shares much of the DNA of the original, Leupold made several changes in the second generation that may matter—especially if you're a serious hunter or long-range shooter.
In this article, I compare the VX-6HD Gen 1 vs Gen 2, break down the real-world differences, and help you decide whether it’s worth making the switch.
VX-6HD Gen 1 vs Gen 2: Is Leupold’s Update Worth It?
If you're in the market for a high-end second focal plane rifle scope—or already own a Leupold VX-6HD—you’ve probably heard about the new Gen 2 update. While it shares much of the DNA of the original, Leupold made several practical improvements that may matter, especially if you hate bringing tools into the field.
In this article, I’ll break down the differences between the VX-6HD Gen 1 and Gen 2, highlight what’s changed in real-world use, and help you decide whether it’s worth making the switch.
What’s New in the VX-6HD Gen 2?
Leupold didn’t overhaul the VX-6HD, but they did refine it in smart ways that improve usability, turret function, and overall field performance.
➕ 5 MOA of Additional Elevation Adjustment
The Gen 2 adds 5 MOA of extra elevation travel to the CDS-ZL2 turret system. This gives you more flexibility for long-range dialing—especially helpful for shooters pushing past mid-range distances. The turret also borrows a bit of the feel and movement from Leupold’s Mark 5 line, which is a nice touch.
⚙️ Speed Set Dial System
This might be the most impactful update. The new turret now features a tool-free quick-release system, allowing you to remove or install ballistic dials on the fly. Adjusting or fixing your zero in the field is now faster and far more convenient.
🔁 Integrated Throw Lever
Zooming just got smoother. Gen 2 scopes now come with a built-in low-profile throw lever on the magnification ring—no need to install a bulky aftermarket one or worry about it catching on gear.
🔋 Redesigned Illumination Cap
The battery compartment for the illuminated reticle now requires a special tool to open. This is more secure (and like Leupold’s Mark 4 series), but depending on your preferences, it may feel like a step backward in convenience.
👁️ Fast-Focus Eyepiece
The addition of a fast-focus eyepiece makes quick diopter adjustments easier. It’s a small but welcome change, especially for those who share optics or hunt in rapidly changing light.
🔬 Subtle Optical Tweaks
Glass quality remains the same—and that’s a good thing. Both generations still use Leupold’s Guard-Ion™ lens coating and excellent glass clarity. No complaints here.
What Stays the Same?
The Gen 2 retains everything that made the original VX-6HD popular:
6:1 Zoom Ratio
Professional-Grade Optical System
Guard-Ion™ Lens Coating
High-Definition Glass
Precision Side Focus
Motion Sensor Technology (MST™) – Auto shut-off for illumination
Electronic Reticle Level
Alumina® Flip-Back™ Lens Covers
Waterproof, Fogproof, and Shockproof
Illuminated Reticle Options
If you’re happy with your Gen 1’s performance and don’t need more turret travel or easier turret customization, rest assured—you’re not missing out on a dramatic leap in optical capability.
Turret Performance: The Real Upgrade
While both versions use the CDS-ZL2 (Custom Dial System – ZeroLock 2), the Gen 2 clearly improves the system with:
Additional 5 MOA of elevation travel
Faster, tool-free dial-swapping
Crisper, more tactile clicks
If you regularly dial for elevation—whether for hunting, long-range shooting, or changing loads—these upgrades matter.
Usability: Gen 2 Just Feels Smoother
From the integrated throw lever to the fast-focus eyepiece, the Gen 2 is simply more polished and efficient in the field. The changes might not sound groundbreaking, but over the course of a long hunt or a day on the range, these quality-of-life improvements add up.
🤔 Should You Upgrade?
Stick with Gen 1 if:
You already own one and it meets your needs
You don’t often dial turrets or change ballistic dials
You prefer a traditional battery cap that doesn’t need a special tool
Go with Gen 2 if:
You want maximum turret travel and faster, tool-free customization
You appreciate integrated features like the throw lever and fast-focus eyepiece
You’re buying new and want the most refined version available
🏁 Final Thoughts
The Leupold VX-6HD Gen 2 isn’t a reinvention—it’s a thoughtful refinement. Leupold kept all the core performance and optical quality of the Gen 1 but added small, practical upgrades that serious shooters and hunters will appreciate.
If your Gen 1 is working well, there’s no urgent reason to swap. But if you're in the market for a new scope—or if you demand the most dialing range, speed, and usability from your optic—the Gen 2 is the clear winner.